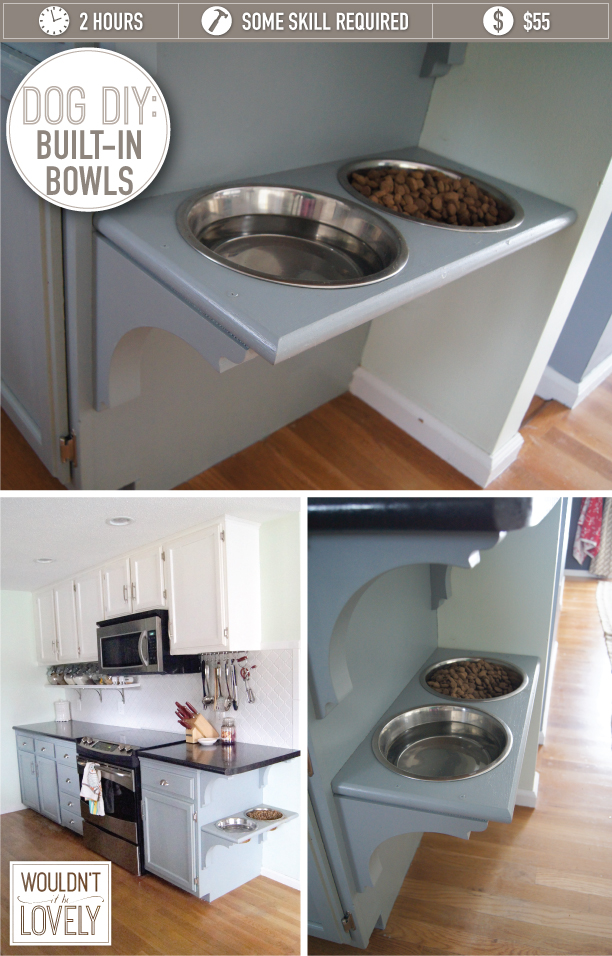
I can't tell you how many times I've accidentally kicked over one of our dogs water bowls. Resulting in a mess and wet socks. Which I HATE. The solution? Building in some doggie feeding stations in when we renovated our kitchen. Though people may argue the need for elevated dog bowls when you have a giant breed like we do, I'm all for it. Building these dog bowls into the kitchen was one of the best things we did for Truman and for me (just so you don't think we left our puggle, Lincoln, out. His bowls are built into a little console we have on the other side of the kitchen. Also, for those of you worrying about resale, we could easily pop off the shelf with the holes cut into it and replace it with a solid shelf and store cookbooks or the like for future non dog owners. Below is the how-to and what you'll need.
Supplies and Tools:
- Screwdriver
- Jig Saw
- 4 corbels. I bought mine here. P.S. you'll only need two if you don't have the overhang like we did
- 1 wood step tread. I bought mine here. When you buy a tread like this, it's great because all the edges are already finished for you. You can also have someone at the store cut it to the length you need. The people at Lowes and Home Depot are great about doing this for you!
- 12 wood screws
Process:
- Decide what height you need the feeder to be at, best practice is about the middle of your dogs chest when standing up. Draw a line with a pencil using a level.
- Figure out where the top of the corbel should be to hold up the shelf at the correct height, it'll probably be about an inch below the line you just drew.
- From the inside of the cabinet, screw a pilot hole through the side of the cabinet into the corbel. Mark two holes, one at the top of each corbel and one at the bottom. Then screw through the cabinet and into the corbels until they are tight.
- Measure out the size of the bowls onto the step. Make sure you go in about 1/2 from the edge of the lip so they don't fall all the way through! Drill a 1 in hole through the step and then use the jigsaw to cut out the holes for the bowls. This is really the only part that requires any real tool skills.
- Drill the step with bowl-holes into the corbels. Sand all your edges and paint it to match your cabinets!
Note: we knew we were going to do this, which is why, when we bought new countertops, I made sure they were longer than the actual cabinets so the feeder would look built in. To add to this look, we added the corbels under the countertop as well. Little touches like that make a big difference to the overall look!

